引子
最近遇到一个需求,需要把一个 UIView 转换为一个 UIIamge,这里用到了 UiKit 的上下文,还需要了解 Core Graphics 的一些内容,所以总结一下。
renderInContext
通过 UIGraphicsBeginImageContextWithOptions 这个方法可以进入上下文,UIGraphicsGetCurrentContext 这个方法可以获取当前的内容,通过 UIGraphicsGetImageFromCurrentImageContext 方法可以把当前的内容转换为 UIImage ,这里用到了 renderInContext 方法。
renderInContext 方法用来渲染当前的内容。
1 | - (UIImage *)imageWithView:(UIView *)view |
drawViewHierarchyInRect
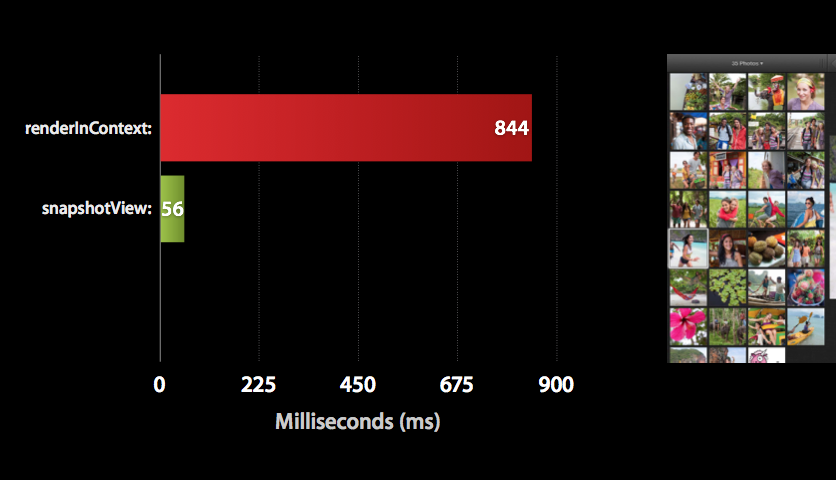
在 iOS7.0 之后引入了一个新的方法 drawViewHierarchyInRect:afterScreenUpdates:,这个方法的速度比 renderInContext 快很多,根据参考的文章里测试,大约快了 15 倍。
但是 drawViewHierarchyInRect:afterScreenUpdates: 需要当前 view 已经渲染在界面上,所以不能直接用在 viewDidLoad 中。
1 | - (UIImage *)imageWithView:(UIView *)view |